



Introduction
There is something magical about a model railroad village. It shrinks an entire world down to a few square feet – trains threading through hills, crossing rivers, stopping at country stations while tiny figures go about their daily lives. Building a miniature village can feel daunting, but with the right approach, any space can become a landscape. This guide will walk you through the entire process, from choosing a scale to adding the final weathered details that make a village feel authentic and lived‑in. Let’s begin.
1. Choosing Your Scale and Planning Your Layout
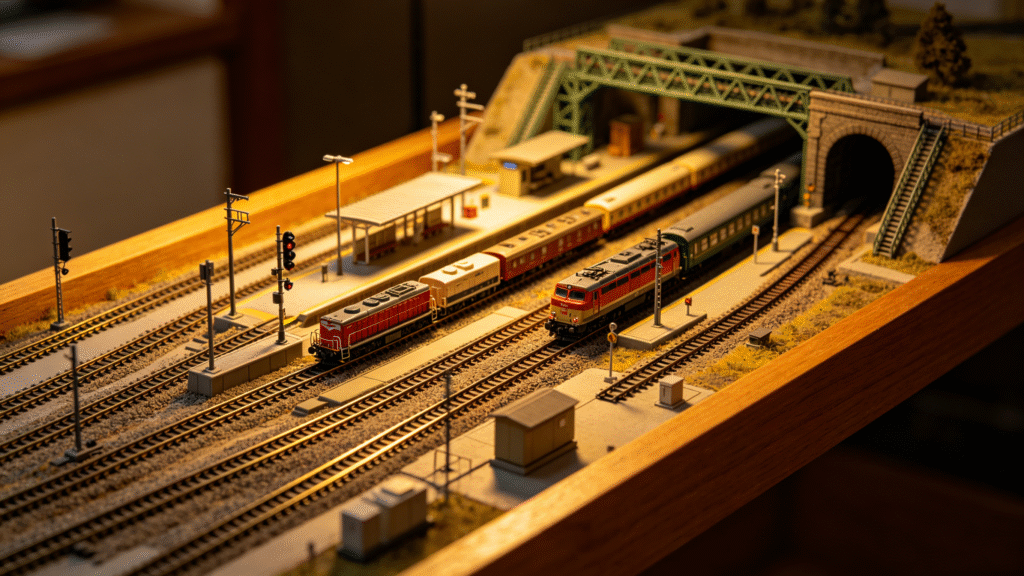
The first big decision is scale. HO (1:87.1) is the most popular choice for good reason: it offers a fine balance between detail and manageability, and you can source nearly any kit or accessory you can imagine. For a custom N scale model railroad layout, however, the story is different. At a ratio of 1:160, N scale is roughly half the size of HO, which means you can pack a surprisingly complete railroad into a very small footprint [7†L30-L31].
In fact, you can fit a complete N scale switching layout comfortably on a 2 x 4 foot board – ideal for apartments, small rooms, or a first project [7†L9-L10]. Because N scale is about 60 % smaller than HO, the same space that holds a single industrial spur in HO can become a whole network of tracks, sidings, and scenery in N.
Tips for small layouts:
- Use tight‑radius curves (a minimum of 9 to 11 inches in N scale) to fit more track in less space.
- Incorporate passing loops or a simple point‑to‑point design to add operational variety without expanding the footprint.
- Use elevation changes and tunnels to create visual interest – a small hill can hide a curve and make the layout feel twice as large [7†L16-L18].
Before cutting any wood, draft your layout on paper or using track planning software. Many enthusiasts successfully plan and build a working custom N scale model railroad layout in as little as 2 x 3 feet, especially when they focus on a single town or industrial district [6†L27-L30]. A well‑thought‑out plan saves time, money, and frustration later.
2. Creating the Landscape – Terrain First, Then Tracks
Experienced modellers know that a railroad looks best when it sits naturally on the land, not when the land is forced around a flat track plan. The best approach is build the terrain first, then lay your track to follow its contours, just as happens in real life.
Start with a lightweight but sturdy baseboard – plywood or foam insulation board works well. Lay down a cardboard mesh to form rough hills, then cover it with plaster‑soaked cloth [3†L15-L18]. Once the plaster hardens, paint the entire surface with an earth‑tone acrylic; this will be your base colour before you add grasses, ballast and other scenic materials.
For a vintage model railroad scene creation – say a steam‑era village from the 1940s or 1950s – the landscape itself needs to feel period‑appropriate. Think dirt roads (not paved), overgrown embankments, and weathered wooden fences. Old photographs and maps are invaluable for recreating a specific time and place [1†L9-L14].
Period authenticity should also guide your choice of structures, vehicles and rolling stock. A 1950s village should feature water columns, coaling towers and older signage, and the automobiles on the road need to match the era – no modern SUVs in a steam‑era scene.
3. Custom Model Train Track Scenery – Ballasting and Ground Cover
Track that floats above a flat green board destroys the illusion. Custom model train track scenerystarts with proper ballast – the crushed stone that supports the rails and ties. The process is straightforward:
- Apply a full‑strength white glue along the edge of the track, all the way up to the tie tops.
- Sift fine grey or dark grey ballast into the wet glue using a plastic spoon.
- Use a foam paint brush (the beveled edge works perfectly) to shape the ballast and level it with the top edge of the roadbed [10†L39-L43].
- For N scale, using Woodland Scenics fine ballast with Kato Unitrack is a proven method: carefully apply the ballast between the rails and along the edges, then wet it with a water‑detergent mixture and secure it with a 50 % white glue / 50 % water mix applied by eyedropper [6†L46-L48].
Once the ballast is dry, apply ground cover around the track. A layer of fine turf in earth tones forms the base, then add static grass for lawns and meadows. The static grass applicator makes grass fibres stand upright, giving a much more natural texture than flat paint.
For a vintage model railroad scene creation, avoid pristine landscaping. Add patches of bare dirt, gravel piles, weeds growing through the ballast, and oil stains near loading docks. A thin black wash applied to the ballast after it dries will suggest years of soot and grime.
4. Buildings, Bridges, and Industrial Scenes
A village needs structures, and those structures need to tell a story. Mix ready‑to‑build kits with kitbashing (combining parts from two or more kits to create something unique) and scratchbuilding to ensure your village does not look like a catalogue display.
For a focal point, consider a custom model railroad bridge. Whether you build a small timber trestle crossing a stream or a towering steel span over a river, a bridge adds drama and gives your track a reason to exist in the landscape [9†L8-L10]. The Model Railroader book Model Railroad Bridges and Trestles provides over 20 sets of scale drawings for scratchbuilding, kitbashing, or modifying commercial bridge kits [4†L10-L13]. Begin with simple kits, add weathering, then advance to a craftsman kit, and finally try scratchbuilding your own beam bridge using wooden ties and plastic girders [4†L4-L8] [8†L2-L5].
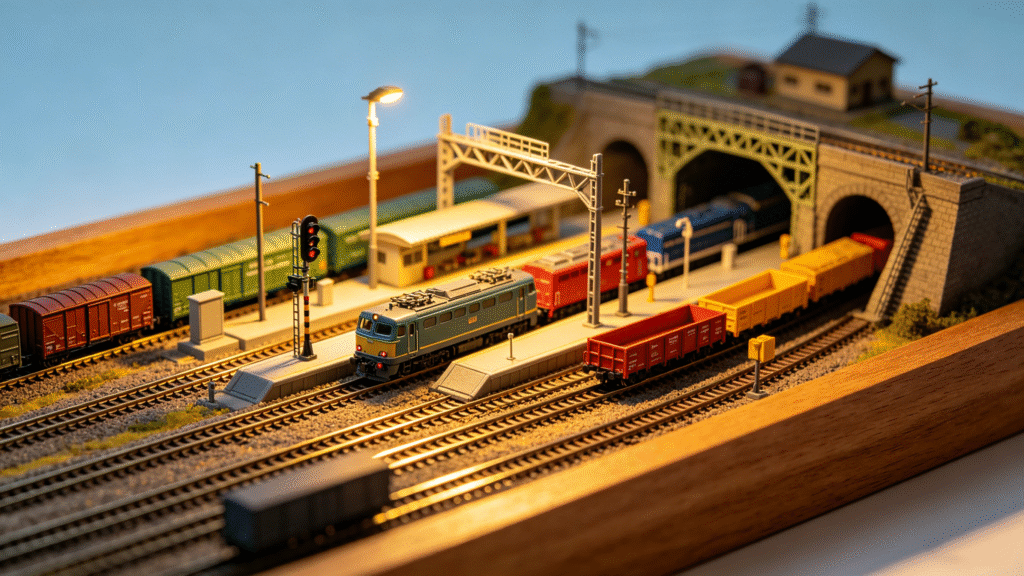
Equally important is the reason trains come to your village. Custom model railroad industrial scene design transforms a pretty display into a working railroad. Place a team track (a general‑purpose loading dock) or a small freight house on a spur off the main line. For a convincing industrial area, you want to keep the buildings small but the operational logic clear – for a switching layout measuring only 14 x 60 inches, four or five industries along with an interchange track can provide endless operational variety [11†L20-L29].
Your industrial scene should also match your chosen era. A grain elevator is timeless, but the vehicles and signage around it must fit the period. Detail is the key: add scrap piles, pallets, old drums, and faded signage [15†L22-L24]. For a vintage model railroad scene creation, weathered billboards and painted company names on brick walls are perfect touches.
5. Water Features, Roads, and Final Details
If your village has a stream or river, do not simply paint the area blue. Build up the riverbed with brown and green washes, then add a layer of clear gloss medium or epoxy resin to simulate water depth. Along the banks, place static grass and bushes to blend the water into the surrounding landscape.
Roads should be appropriate to your era. For a vintage village, dirt or gravel roads are more believable than paved asphalt. Mix fine sand into grey paint, apply it with a sponge, and dry‑brush with lighter grey to create a natural, worn texture.
Finally, add figures. A handful of painted people – a farmer unloading a truck, children waiting at a crossing, a station master on the platform – instantly brings the scene to life. For a custom N scale model railroad layout, figures are tiny but essential: they provide scale and make the village feel inhabited [7†L18-L19].
6. Bringing It All Together – A Complete Example
Imagine a custom N scale model railroad layout measuring just 8 x 2 feet.
- Era: 1950s (a vintage model railroad scene creation)
- Track plan: A runaround track, a switching lead, and four spurs: a grain elevator, a team track, a small warehouse, and a coal dealer.
- Custom model train track scenery: Dark grey ballast weathered with brown washes, static grass on the banks, and a gravel road leading to the team track.
- Custom model railroad bridge: A small steel truss bridge carries the main line over a creek at the front of the layout, weathered with layers of peeling paint and realistic surface rust [9†L5-L7].
- Custom model railroad industrial scene design: The grain elevator and coal dealer provide regular switching work, while the team track accepts any car that arrives on the interchange track.
The completed scene is not just a display – it is a working miniature world where every train has a purpose.
Conclusion
Building a miniature model railroad village is one of the most rewarding projects in the hobby. It takes planning, patience, and a willingness to learn new skills, but the result is a world you created with your own hands – a world where trains run on time, villages feel alive, and every detail tells a story.
Whether you dream of a custom N scale model railroad layout tucked onto a bookshelf, a vintage model railroad scene creation that captures the spirit of a bygone era, or a layout featuring a custom model railroad bridge and custom model railroad industrial scene design, the journey is as satisfying as the destination. And with custom model train track scenery bringing every element together, your miniature village will be a source of pride for years to come.
Happy modelling.

Leave a Reply