Custom Model Railroad Diorama
Building a Custom Model Railroad Diorama is a wonderful way for model railroad enthusiasts to express their creativity and craft a unique scene that reflects their personal style. As a beginner, you don’t need advanced professional skills—just follow the step-by-step guide of “Planning → Foundation → Detailing → Final Adjustment”, and you’ll be able to create your own personalized diorama. Below is a comprehensive, easy-to-follow tutorial designed specifically for beginners, focusing on practicality and operability to help you avoid common mistakes.
I. Preliminary Planning (Top Priority for Beginners to Avoid Rework)
Planning is the cornerstone of a successful Custom Model Railroad Diorama. Taking the time to clarify your needs before starting will save you significant time, effort, and material costs. Focus on these 3 key aspects:
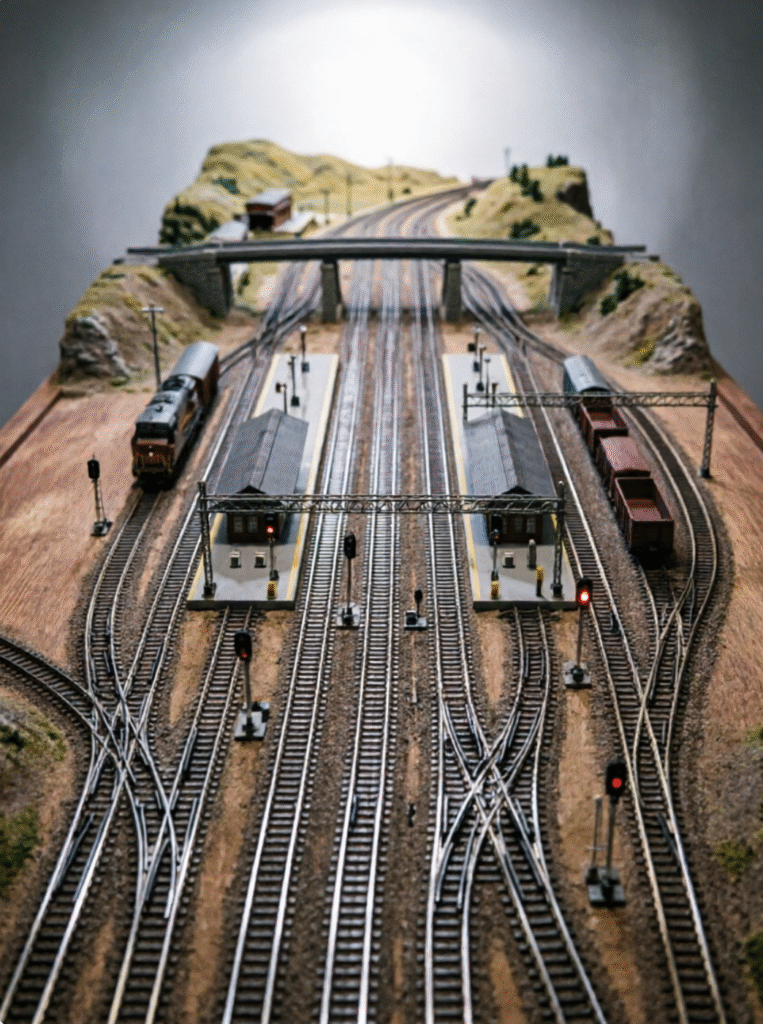
1. Determine Core Parameters (Align with Your Needs, Don’t Overcomplicate): First, decide on the diorama size—for beginners, a small desktop model (e.g., 60cm×80cm) is ideal, as it’s easy to handle and fits most spaces. Next, choose the model scale: HO scale is the best choice for beginners due to its wide compatibility and easy-to-find accessories. N scale is a great alternative for smaller spaces, while O and Z scales are more expensive and less beginner-friendly. Finally, pick a theme style—retro towns, simple countryside, or basic urban scenes are perfect for beginners (simple elements, easy to execute), while industrial or mountainous themes can be tackled as you gain experience.
2. Draw a Simple Layout (No Professional Software Required—Hand-Drawn Works!): Sketch the diorama’s outline on a piece of paper, mark the train track route (stick to straight lines and a few gentle curves to avoid unnecessary difficulty), and outline core scene areas (e.g., stations, houses, vegetation, roads). Clearly map out where each element will go to ensure tracks and scenery don’t conflict, and leave enough space for you to operate the train.
3. Gather Materials and Tools (Keep It Simple—No Need for High-End Gear): You don’t need expensive professional tools; a basic set will suffice. Here’s a core list (buy only what you need to avoid waste):
Basic Materials: Diorama base (wooden or foam board—lightweight and easy to cut), model tracks (splicing-style tracks for beginners, no welding needed), miniature accessories (finished houses, trees, figures, street lights—prioritize finished products to reduce manual work), and terrain materials (gypsum powder, sponge, fine sand for creating hills or flat ground).
Basic Tools: Utility knife (for cutting the base and materials), glue (white latex for accessories, hot melt glue for fixing tracks), fine-tipped paintbrushes (for coloring), ruler (to ensure tracks are flat), and sandpaper (to smooth the base and remove burrs).
II. Foundation Construction (Build a Solid Base for Long-Lasting Durability)
A strong foundation is essential for a durable Custom Model Railroad Diorama. Follow these 3 simple steps—no professional skills needed:
1. Make the Diorama Base: Cut the foam or wooden board to your planned size, then sand the edges to remove burrs. For extra stability, attach a thin wooden sheet to the bottom of the base to prevent warping. Beginners should stick to a flat base—you can add layers later with terrain, so no need for complex 3D bases.
2. Lay the Train Tracks: Splice the tracks according to your layout, place them on the base, and adjust the direction to ensure they’re flat and tightly connected (no gaps—these can cause the train to get stuck). Use a small amount of hot melt glue to secure the track bottoms (don’t overdo it—excess glue will ruin the look, and you can adjust the position later).
3. Create Basic Terrain (Simplify for Beginners—No Need for Complex Landscapes): To make simple undulating terrain (e.g., small hills or depressions), cut a sponge to the desired shape, glue it to the base, cover it with gypsum powder, smooth it out, and let it dry for 24 hours (avoid direct sunlight). For a flat scene, simply lay a layer of fine sand or gypsum on the base as the ground.
III. Detailing (The Key to Bringing Your Diorama to Life)
Detailing is what makes your Custom Model Railroad Diorama unique and realistic. Follow the “large to small, main to secondary” rule—you don’t need perfect precision; focus on creating a cohesive atmosphere. Here’s how:
1. Place Core Scene Elements: Start with large accessories (e.g., miniature houses, stations, bridges). Position them according to your layout and glue them firmly with white latex to prevent shaking. Beginners should use finished accessories, but if you want to try DIY, simple houses made from cardboard and clay are easy to make.
2. Add Auxiliary Details: Use small accessories (figures, vehicles, street lights, road signs) to add life to the scene. For example, place figure models near the station or small cars on the roads to boost realism. For vegetation, use finished model trees or cut green sponge into grass shapes—glue them evenly to the terrain (avoid overcrowding).
3. Coloring (Simplify for Beginners—Uniformity Is Key): Use fine-tipped brushes to color the base and accessories. Paint the ground earthy yellow or gray (to simulate real ground), houses in theme-appropriate colors (warm tones for retro towns, cool tones for industrial scenes), and vegetation green. Apply thin coats of acrylic paint (easy to dry, fade-resistant) to avoid paint clumps or runs.
IV. Final Adjustment (Ensure Your Diorama Works Perfectly)
Final adjustment is often overlooked by beginners, but it’s crucial for ensuring your Custom Model Railroad Diorama is usable and long-lasting. Focus on these 2 points:
1. Secure and Inspect: Once all glue and paint are completely dry, check that all accessories are firmly fixed and tracks are flat (no looseness or misalignment). If tracks are stuck, adjust the joints or sand them gently to ensure the train runs smoothly.
2. Clean and Maintain: Use a soft brush to remove dust and paint debris from the diorama. During use, avoid collisions and direct sunlight; clean the tracks regularly to prevent dust buildup. Re-glue any loose accessories promptly.
V. Beginner Pitfall Guide (Must-Read to Avoid Mistakes)
1. Don’t Overcomplicate: Start with a simple scene—avoid complex mountains, tunnels, or multi-layer tracks at the beginning (these are easy to mess up). Progress to more complex elements as you gain experience.
2. Don’t Waste Materials: Buy accessories and tools on demand—don’t stock up unnecessarily. For scale-related items, confirm the scale matches your model before buying (otherwise, they won’t fit).
3. Be Patient with Drying: Let gypsum, glue, and paint dry completely before moving to the next step. Rushing will cause deformation, peeling, or other issues that ruin the diorama’s quality.
4. Prioritize Tracks: Ensure tracks are flat and smooth before adding decorations—don’t let scenery block the tracks (this will stop the train from running).
Summary: Building a Custom Model Railroad Diorama for beginners is all about simplifying operations and taking it step by step. Start with careful planning, build a solid foundation, add details, and finish with adjustments. You don’t need professional expertise—just follow this guide and let your creativity shine. As you become more proficient, you can add complex elements to make your diorama even more impressive and collectible.scale model
Leave a Reply